Save to Pinterest
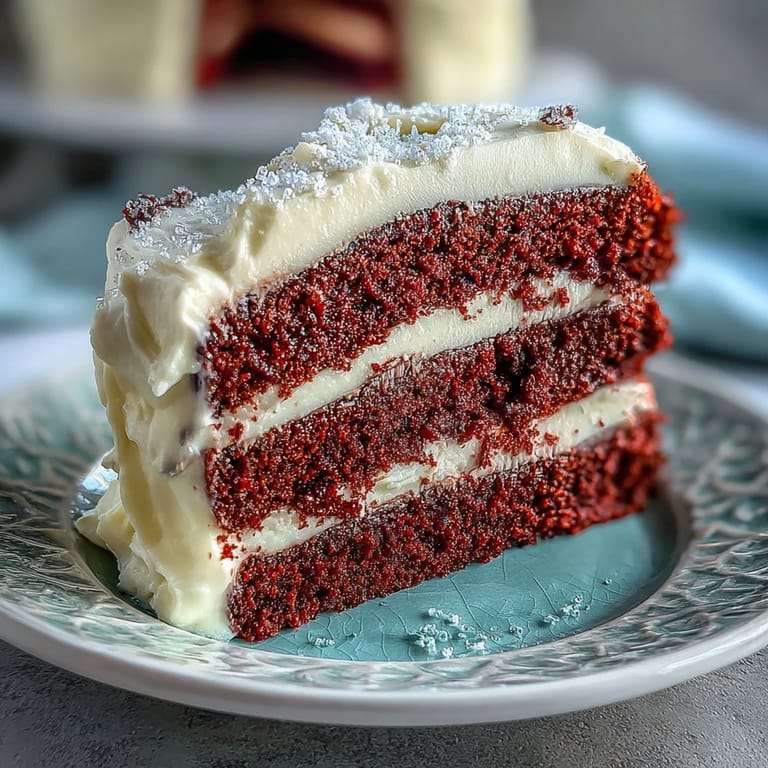
 There's something incredibly vibrant about the rich, crimson color of a Red Velvet Cake, especially during a Juneteenth celebration. I remember one summer when we gathered on the porch, the laughter mingling with the scent of cocoa in the air, as I prepared this classic dessert. Each time I make it, the anticipation of slicing through that velvety cake is like unwrapping a beautiful gift. The first bite is always a little thrilling— that perfect blend of sweet and a hint of cocoa. It’s not just a cake; it’s a celebration of heritage and joy.
The first time I baked this for my family, there was an unmistakable excitement in the kitchen. My aunts were all chatting away, and as I pulled the cakes from the oven, the warm, inviting scent enveloped us like a cozy blanket. Everyone gathered around, eager to help frost the layers, each contributing their own sprinkle of love. Laughter echoed, and the simple act of decorating transformed the evening into something magical. We all knew then it was more than a dessert; it was a part of our family tradition.
Ingredients
- All-purpose flour: This forms the backbone of the cake, providing structure and that beautifully soft crumb.
- Granulated sugar: Adds sweetness and moisture to the cake.
- Baking soda: Essential for leavening, giving the cake its airy texture.
- Cocoa powder: A subtle addition for a hint of chocolate flavor that complements the cake's vibrant color.
- Vegetable oil: Keeps the cake moist and tender.
- Buttermilk: Introduces a slight tang that balances the sweetness.
- Eggs: Provide richness and stability to the batter.
- Red food coloring: Gives the cake its signature hue; feel free to adjust for a deeper tone.
- Distilled white vinegar: Enhances the cake's color and aids in leavening.
- Cream cheese: The heart of the frosting, creating a luscious and creamy texture.
- Unsalted butter: Adds richness to the frosting.
- Powdered sugar: Sweetens the frosting, giving it that perfect spreadable consistency.
Tired of Takeout? 🥡
Get 10 meals you can make faster than delivery arrives. Seriously.
One email. No spam. Unsubscribe anytime.
Instructions
- Preheat the oven:
- Set it to 350°F (175°C) and don't forget to grease and flour those cake pans. It’s the little things that ensure a perfect release!
- Sift the dry ingredients:
- Mix flour, sugar, baking soda, salt, and cocoa powder together. This lightens the flour and avoids any lumps that could ruin the texture.
- Whisk the wet ingredients:
- In a large separate bowl, combine the oil, buttermilk, eggs, food coloring, vinegar, and vanilla. This will yield a wonderfully vibrant mixture.
- Combine wet and dry:
- Carefully add the dry ingredients into the wet mixture, stirring until just blended. Avoid the temptation to overmix!
- Divide and bake:
- Pour the batter into the prepared pans and bake for 28-32 minutes. A toothpick should come out clean— golden brown is our goal.
- Cool the cakes:
- Let them rest in the pans for 10 minutes before transferring to a wire rack. Patience is key as they cool completely!
- Make the frosting:
- Beat the cream cheese and butter until fluffy, then gently mix in the powdered sugar, vanilla, and salt. This step makes all the difference for a smooth frosting!
- Assemble your cake:
- Spread a layer of frosting between the cooled cakes, topping it generously. Frost the sides and top; it’s okay to be generous here!
- Garnish:
- Decorate with red or gold sprinkles if you’re feeling fancy or use cake crumbs for a more rustic touch. Let your creativity shine!
 Save to Pinterest
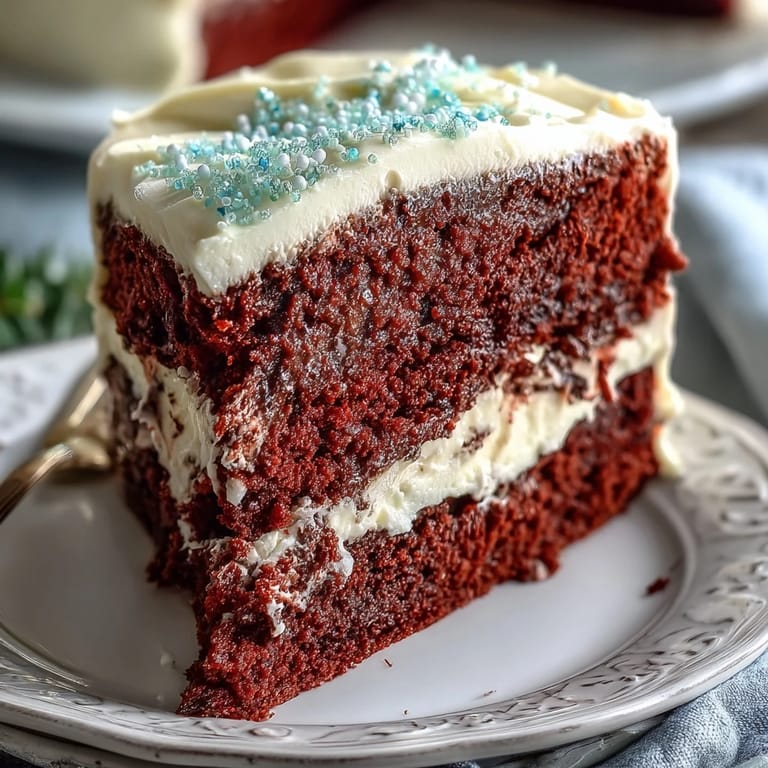
 The moment the first slice was served, the applause that followed felt like an anthem of joy. Everyone dove into their pieces with delight, and it turned dinner into an unforgettable gathering of stories and laughter. Each forkful felt like a connection to our roots, a reminder of the past blended with new memories. That’s what makes cooking so special—each dish tells its own story, binding us together.
Secrets to the Perfect Cake
Always use room temperature ingredients for a smoother batter and better mixing. It really does make a difference!
Visual Appeal
Presentation matters; a well-frosted cake can elevate the dining experience. The vibrant red against a creamy white frosting creates a feast for both the eyes and the taste buds!
Make it Your Own
Feel free to experiment with flavors; a pinch of cinnamon in the batter or a splash of almond extract in the frosting can introduce a personal touch.
- Consider pairing it with a scoop of vanilla ice cream for a decadent dessert.
- A light dusting of cocoa powder on top of the frosting adds an elegant finish.
- Remember, the best moments are often those shared over food!
 Save to Pinterest
 This Red Velvet Cake isn’t just dessert; it’s a cherished experience meant to be shared. Enjoy every moment in and out of the kitchen as you create lasting memories!
Recipe FAQs
- → What makes this cake red?
The bright red color of the cake comes from the use of red food coloring, which is a hallmark of traditional red velvet cakes.
- → Can I make this cake dairy-free?
Yes, you can substitute dairy ingredients with non-dairy versions, such as using almond milk instead of buttermilk and a dairy-free cream cheese for the frosting.
- → How can I store the cake?
Store the cake covered in the refrigerator for up to three days, or freeze it for longer storage.
- → Can I add flavors to the frosting?
Yes, consider adding orange zest or a touch of almond extract for a unique flavor twist.
- → What tools do I need to make this cake?
You will need two 9-inch round cake pans, mixing bowls, an electric mixer, and a sifter for the best results.