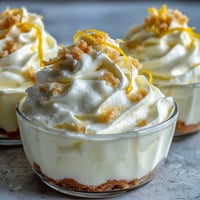
 Save to Pinterest
 There's a particular Sunday afternoon I can't shake from memory—I was standing in my kitchen with afternoon light streaming through the windows, watching my grandmother's old springform pan sit empty on the counter. She'd always made cheesecake for holidays, the kind that disappeared faster than anyone expected, and that day I decided it was time to stop just eating it and actually understand how to make it. What started as curiosity turned into an obsession with getting that exact balance of creamy density and subtle tang that makes New York cheesecake so impossibly good.
I made this cheesecake for a friend's birthday dinner last fall, and watching people take that first bite was worth every minute of the prep and waiting. Someone asked for the recipe immediately, which never happens—usually people just give you that polite smile and move on. Turns out, they'd been trying to recreate their favorite bakery version for years, and this one actually measured up.
Ingredients
- Graham cracker crumbs (200 g): Use about 14-16 full crackers crushed into fine crumbs; store-bought crumbs work but fresh is noticeably better and worth the 30 seconds of work.
- Unsalted butter, melted (100 g): Melted butter binds the crust beautifully, and unsalted gives you control over the salt level in every layer.
- Granulated sugar for crust (2 tbsp): Just enough sweetness to balance the slightly salty graham crackers without overpowering them.
- Full-fat cream cheese (900 g): This is non-negotiable—room temperature cream cheese beats cold cream cheese every single time, and full-fat creates that silky texture that low-fat versions simply can't deliver.
- Granulated sugar for filling (200 g): The sweetness layer that makes this indulgent without being cloying.
- Sour cream (240 ml): This adds tang and complexity that keeps the cheesecake from tasting one-dimensional; it's the secret most people miss.
- Large eggs (3): Room temperature eggs incorporate smoothly and create the right custard structure; cold eggs resist mixing and can cause lumps.
- Cornstarch (1 tbsp): A small amount prevents cracks by absorbing moisture and creating a more forgiving texture.
- Pure vanilla extract (2 tsp): Pure vanilla has depth that imitation simply doesn't match.
- Fresh lemon juice (1 tbsp): Brightens the filling and cuts through richness so each bite feels balanced.
Tired of Takeout? 🥡
Get 10 meals you can make faster than delivery arrives. Seriously.
One email. No spam. Unsubscribe anytime.
Instructions
- Toast your crust foundation:
- Heat your oven to 160°C and prepare your springform pan with parchment paper on the bottom. Combine graham cracker crumbs with melted butter, sugar, and salt until it feels like damp sand between your fingers.
- Build the crust:
- Press the mixture firmly into the pan—you want it compact enough to hold together but not so dense it tastes like a brick. Bake for 10 minutes until lightly golden, then let it cool while you move forward.
- Cream the cheese smoothly:
- This step determines everything. Beat room-temperature cream cheese on medium speed until it's completely smooth and creamy, about 2 minutes; you're looking for a texture with no lumps or graininess.
- Build sweetness carefully:
- Add sugar gradually while beating, giving it time to incorporate fully so you end up with a uniform, fluffy mixture rather than grainy texture.
- Fold in the flavor elements:
- Mix in sour cream, vanilla, lemon juice, cornstarch, and salt on low speed, stirring just until combined; overmixing introduces air bubbles that crack the top during baking.
- Add eggs with restraint:
- Drop in one egg at a time on low speed, scraping down the bowl after each addition and resisting the urge to beat vigorously. Each egg needs gentle incorporation, not aggressive mixing.
- Pour and smooth:
- Spread the filling over your cooled crust and smooth the top with a spatula to create an even surface that bakes uniformly.
- Create a water bath:
- Place your springform pan inside a larger roasting pan, then carefully pour hot water into the outer pan until it reaches halfway up the sides of the springform. This gentle heat distributes evenly and prevents the edges from overcooking before the center sets.
- Bake with patience:
- Bake for 55–65 minutes until the edges are set but the very center still jiggles slightly when you gently shake the pan. The center continues cooking after you remove it from heat.
- Cool gradually in the oven:
- Turn off the oven, crack the door open a few inches, and let the cheesecake sit there for a full hour. This slow temperature drop prevents thermal shock that causes cracks.
- Finish cooling and chill:
- Remove from the oven, run a thin knife around the edges to prevent sticking, and let it cool to room temperature. Refrigerate for at least 6 hours, though overnight is genuinely better—flavors deepen and texture sets perfectly.
- Add topping if desired:
- Mix sour cream with powdered sugar and vanilla, then spread gently over the chilled cheesecake for an extra silky layer.
- Slice and serve:
- Use a hot, clean knife (wipe it between slices) to cut clean portions that look intentional rather than jagged.
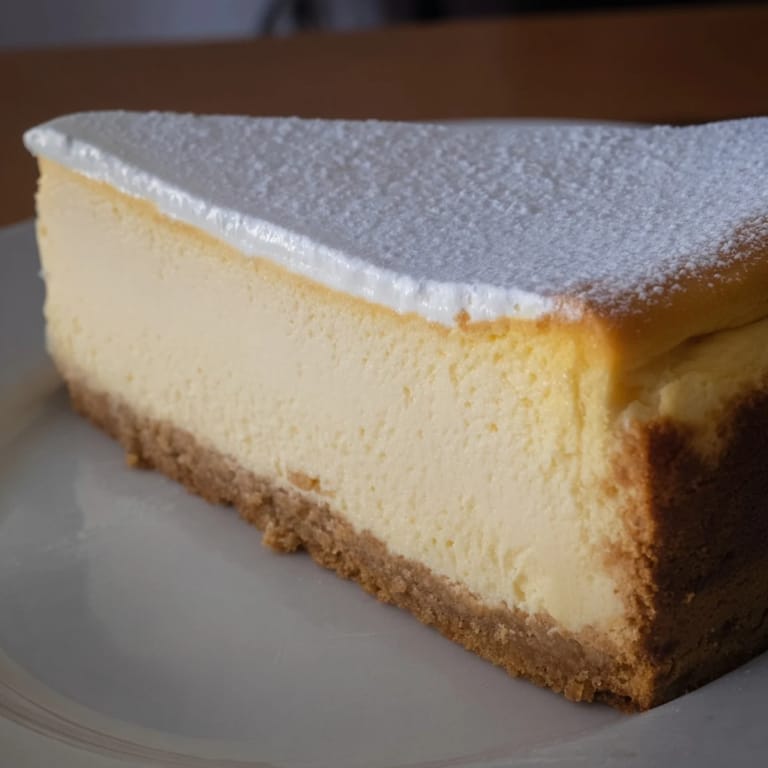
 Save to Pinterest
 The moment that convinced me this recipe was worth repeating came when my neighbor knocked on my door asking if I'd made it again—she'd smelled it baking two hours earlier and couldn't stop thinking about it. That's when I realized this wasn't just dessert; it was the kind of thing that creates small, genuine moments between people.
The Water Bath Secret
I resisted using a water bath for my first attempts, convinced it was unnecessary fussiness, until I realized every single crack in my cheesecake could be traced back to uneven heat. The water bath acts like a temperature buffer, ensuring the filling bakes gently rather than overcooking at the edges while the center struggles to set. It's the difference between a cheesecake that looks intentional and professional versus one that looks homemade in a way that reads as failed.
Timing and Patience Matter
The entire process from mixing to serving spans about seven hours, and every single stage has a reason. Rushing the cooling step in the oven turns a beautiful cheesecake into one with a network of cracks that, while they won't affect taste, will make you wish you'd waited just a little longer. The refrigeration overnight isn't laziness—it's when the flavors settle and the texture becomes that perfect balance of dense and creamy.
Variations and Personal Touches
Once you have the classic version down, this recipe becomes a foundation for experimentation. I've swirled melted chocolate through the filling before baking, topped it with fresh berries, and served it alongside strong coffee for a simple elegant finish. The structure remains the same; the creativity lives in what you choose to layer on top or weave through the filling.
- Fresh berry compote adds brightness and acidity that cuts through the richness perfectly.
- A chocolate swirl works best added in the last few seconds before baking, creating visual drama without compromising texture.
- Late harvest Riesling or quality coffee becomes essential pairing rather than afterthought when you're serving this.
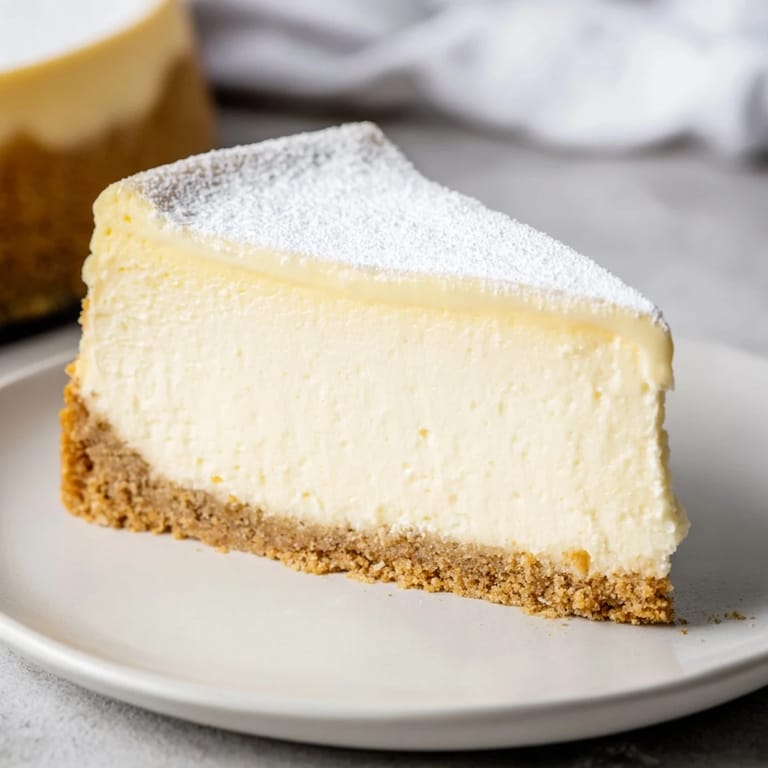
 Save to Pinterest
 Making this cheesecake taught me that some recipes deserve the time and attention they ask for. The reward isn't just in the finished dessert; it's in that quiet kitchen moment while it bakes, filling your space with warmth and possibility.
Recipe FAQs
- → What makes the crust crispy and flavorful?
The crust combines graham cracker crumbs with melted butter and a pinch of sugar and salt, which when baked, forms a crunchy and buttery base.
- → Why is a water bath used during baking?
A water bath gently cooks the cheesecake by providing moisture and even heat, preventing cracks and ensuring a creamy texture.
- → Can I prepare this dessert ahead of time?
Yes, the cheesecake requires chilling for at least six hours or overnight to set properly and develop its flavors.
- → What is the role of cornstarch in the filling?
Cornstarch acts as a stabilizer to help the filling set firmly while maintaining a smooth and creamy consistency.
- → How can I customize the topping?
An optional topping of sour cream mixed with powdered sugar and vanilla adds a tangy sweetness, enhancing the cheesecake’s richness.